Good Home Gym Equipment For Quiet Indoor Climbing
By Amina Rahman • 17th May
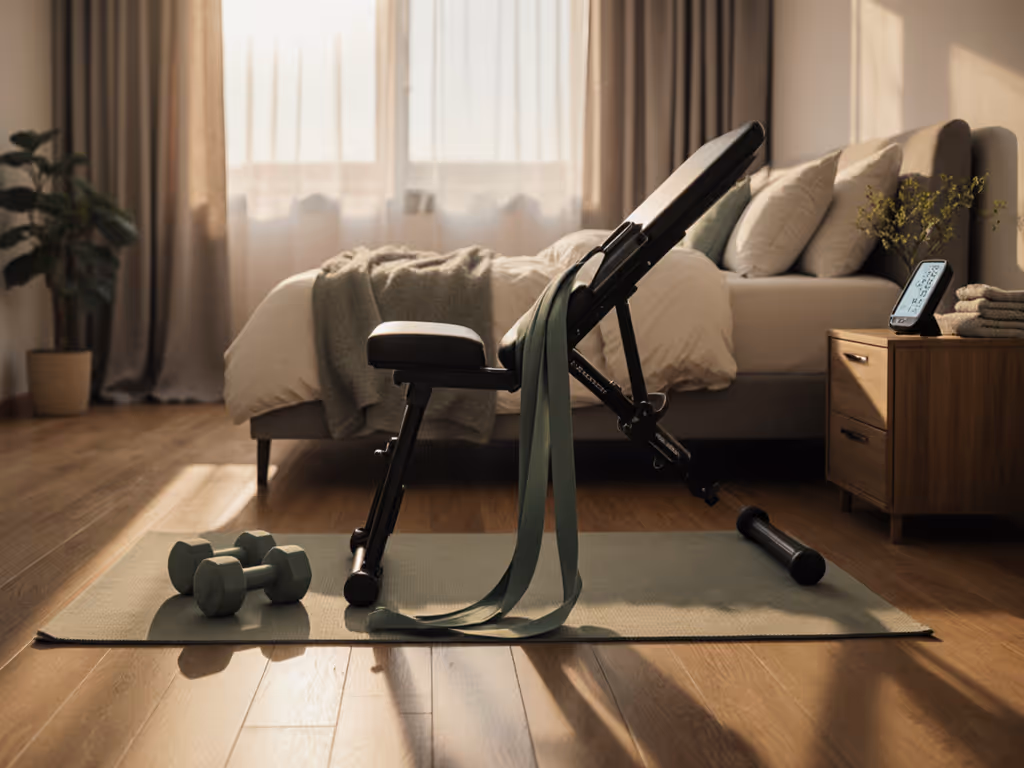
If you live with thin walls, sleeping kids, or close neighbors, good home gym equipment for climbers has to be more than strong and compact, it has to be quiet. The right indoor climbing training gear lets you build finger strength, pulling power, and core tension without thuds, squeaks, or angry texts from downstairs.
In this step-by-step guide, I'll walk you through a phased, data-driven roadmap: what to buy now, what to add next, and what to reserve for later once you know your space, noise limits, and training style. We'll review key gear types (with a detailed look at one portable hangboard) and compare how they score on:
- Noise and vibration
- Space and storage
- Installation and landlord-friendliness
- Training carryover to actual climbing
- Total cost of ownership over a few years
The north star: Start lean, upgrade on schedule, avoid sunk-cost traps.
Step 1 - Map Your Quiet Constraints Before You Buy Anything
Roadmap, then checkout. Before you even look at hangboards, treat the room like a small engineering project.
1.1 Measure the volume you actually have
Grab a tape measure and a notepad:
- Wall width and height for any potential home climbing wall setup or hangboard. Note:
- Width: aim for at least 60-90 cm (2-3 ft) of clear space.
- Height: 210-240 cm (7-8 ft) is usually enough for hangboards and rings.
- Ceiling height and any obstructions (beams, fans, garage door tracks).
- Floor area you can permanently dedicate vs. share with office/guest room.
Sketch a top-down layout with doors, windows, and closets. That lets you see where a pull-up station or mat will block traffic.
1.2 Identify your noise and vibration limits
You don't need a decibel meter to get useful data.
- Impact test: Do 10 light jump squats on bare floor and on a folded towel or mat.
- If downstairs notices or you feel the floor flex, rule out heavy drops or plyometrics.
- Wall stiffness test: Knock on the wall where you might mount a board.
- Hollow, drum-like sound -> thin, potentially resonant drywall.
- Solid, dull thud -> likely better for mounting, less vibration.
- Time windows: Note when noise must be minimal (e.g., 6-8 am near bedrooms).
Most climbers can keep sessions under normal conversation level (roughly 55-65 dB) by avoiding:
- Dropping weights
- Dynamic campusing
- Loud fans or belt-driven cardio
That's critical if you're doing bouldering training at home in an apartment. For step-by-step ways to damp impact and vibration in multi-unit buildings, see our apartment gym noise control guide.
1.3 Check landlord/HOA and building rules
Look specifically for:
- Prohibitions on permanent wall anchors or heavy wall loads
- Weight limits on balconies or upstairs rooms
- Quiet hours or gym equipment clauses
If you're not sure, plan your first phase around portable, non-anchored gear. Wall-mounted items can wait until you've proven the concept.
Step 2 - Define Your Climbing Priorities (So You Don't Overbuy)
Most quiet indoor climbing setups should focus on four pillars:
- Finger strength - crimps, pockets, pinches
- Vertical pulling - pull-ups, rows
- Core and body tension - anti-rotation, front-lever patterns
- Conditioning - pump resistance and general fitness
For each pillar, list whether you're:
- Primary goal: Indoor bouldering performance
- Primary goal: Sport climbing endurance
- Mixed / general climbing fitness
Then map your needs to minimal gear:
- Fingers -> hangboard or finger strength training equipment you can actually use 2-3x/week
- Pulling -> doorframe or wall-mounted pull-up solution
- Core -> rings/TRX, floor space, maybe parallettes
- Conditioning -> bands and/or low-noise cardio
This becomes your buying filter: if a piece of indoor climbing training gear doesn't advance at least one of these, leave it in the cart.
Step 3 - Start With Quiet Finger Strength Tools (Now Phase)
Finger strength is where climbers get the biggest climbing-specific return per square foot and per decibel.
3.1 Portable hangboard vs wall-mounted hangboard
Portable hangboard (door, tree, or anchor-hung)
- Noise: Very quiet, most sound is from your breathing and slight wood friction.
- Space: Lives in a drawer or on a shelf; goes up only during sessions.
- Install: No drilling if you hang from a sturdy beam, pull-up bar, or purpose-made strap.
- Best for: Renters, travelers, minimalists, anyone unsure about permanent mounting.
Wall-mounted hangboard
- Noise: Still low, but poorly mounted boards can creak and transmit vibration through studs.
- Space: Always visible; can double as a coat/gear rack in multi-use rooms.
- Install: Requires drilling into studs and careful load distribution.
- Best for: Owners or long-term renters with solid walls and clear landlord approval.
Both support elite-level finger gains, but the portable option wins for flexibility and noise-sensitive buildings.
3.2 Featured product: portable hangboard for multi-grip finger training
One compact option in this category is the Portable Hangboard for Rock Climbing Holds, Fingerboard Trainer for Hand Grip Strengthener, Pinch Block Grip, Home Gym Fitness Workout Equipment - Hard Wood by masilas.
From a planner's standpoint, it checks several key boxes:
- Training versatility in a tiny footprint - Around 0.28 kg with 14 grip positions (edges in the 20-8 mm range, plus single- and two-finger pockets). That lets you scale from beginner load-sharing hangs to advanced half-crimp work and pinch training.
- Quiet, skin-friendly material - Hardwood tends to be both durable and quieter against skin than rough plastic. You get less squeak and smoother friction changes when you chalk up.
- Portability and storage - Roughly "small box" sized, with a rope included for hanging. It's light enough to travel with and easy to stash in a drawer when the room needs to look like an office again.
- Progression range - The mix of shallow and slightly deeper edges supports months to years of structured progression if you manage volume and added weight carefully.
From customer feedback and design, a realistic pros/cons view:
Pros
- High grip density per cubic inch, ideal for tiny apartments.
- Wood finish is gentler on skin and typically quieter than resin holds.
- No fixed mounting required; compatible with door bars, beams, or sturdy overhead anchors.
- Affordable entry point (around $30 at the time of writing), especially vs. full wall systems.
Cons / caveats
- Some reviewers note strong finish/odor initially; plan to air it out if you're sensitive.
- As with any compact board, a few holds may feel too small or awkward depending on hand size.
- A minority of users have reported breakage; inspect regularly for cracks, and avoid dynamic, swinging movements.
Used conservatively (controlled, static hangs; progressive loading; 2-3 sessions/week), it's a strong value for quiet climbing-specific training in cramped, shared spaces.
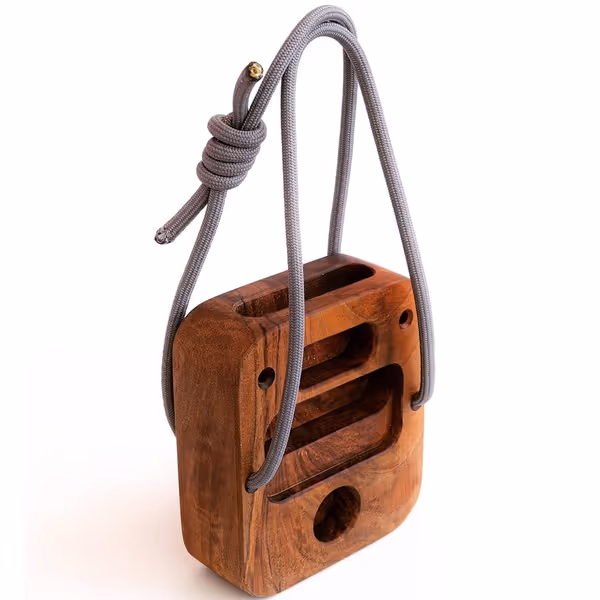
Portable Hardwood Hangboard
Portable, multi-functional hangboard for climbers of all levels.
$29.9
Weight290g
Weight290g
Pros
Versatile for all skill levels (beginner to advanced)
Extremely portable for indoor/outdoor use & travel
Durable hardwood construction for longevity
Cons
Some users report strong odor from excessive oil
Customers find it useful for finger training and appreciate its design and portability. However, some have experienced issues with a strong odor from excessive oil, unusable holds, and the product breaking during use.
Customers find it useful for finger training and appreciate its design and portability. However, some have experienced issues with a strong odor from excessive oil, unusable holds, and the product breaking during use.
3.3 Using a portable hangboard quietly and safely
To keep noise and risk low:
- Mount to a stable structure: a solid pull-up bar, load-rated ceiling beam, or commercial wall anchor rated well above your bodyweight.
- Avoid kipping or campusing. These spike both sound and peak forces.
- Use a timer app instead of loud beeps for intervals.
- Pair with a small floor mat, not for dropping, but to soften any foot taps or step-downs.
Training template (2x/week, 20-25 minutes):
- 5-7 min warm-up: arm swings, finger flicks, easy scap pull-ups.
- 6-8 sets of 7-10 second hangs, 2-3 grip types, 2-3 min rest.
- 5-10 min of pinch or open-hand work using the wider grips.
This alone can carry most climbers through serious bouldering training at home phases, especially when outdoor or gym time is limited.
3.4 Portable vs fixed: total cost of ownership
Over a 3-5 year window:
- Portable board
- Lower upfront cost.
- No patching/painting walls when you move.
- Easy to resell or lend if your needs change.
- Fixed board
- Slightly higher cost plus mounting hardware.
- Potential wall repair on exit for renters.
- Always ready to use, no setup time.
If you're unsure you'll stay in your current place for 3+ years, a portable board is usually the smarter first purchase.
Step 4 - Add Quiet Pulling and Core Tools (Now -> Next Phase)
Once your fingers are covered, layer in quiet climbing workout gear that builds pulling strength and body tension without turning your room into a jungle of metal.
4.1 Pull-up options and noise profile
Doorway pull-up bar (no screws)
- Noise: Minimal if you avoid kipping; occasional creak if fit is poor.
- Pros: No drilling, cheap, fast to remove.
- Cons: Not ideal for heavy weighted work; may scuff trim.
Doorframe or wall-mounted bar (screwed into studs)
- Noise: Very quiet if properly installed, your body is the only moving mass.
- Pros: Higher stability, better for rings and portable boards.
- Cons: Requires drilling and careful stud finding.
Recommendation: For renters, start with a well-reviewed, no-screw bar and treat it as infrastructure for your portable hangboard and rings. Owners with solid walls can step straight to a stud-mounted bar.
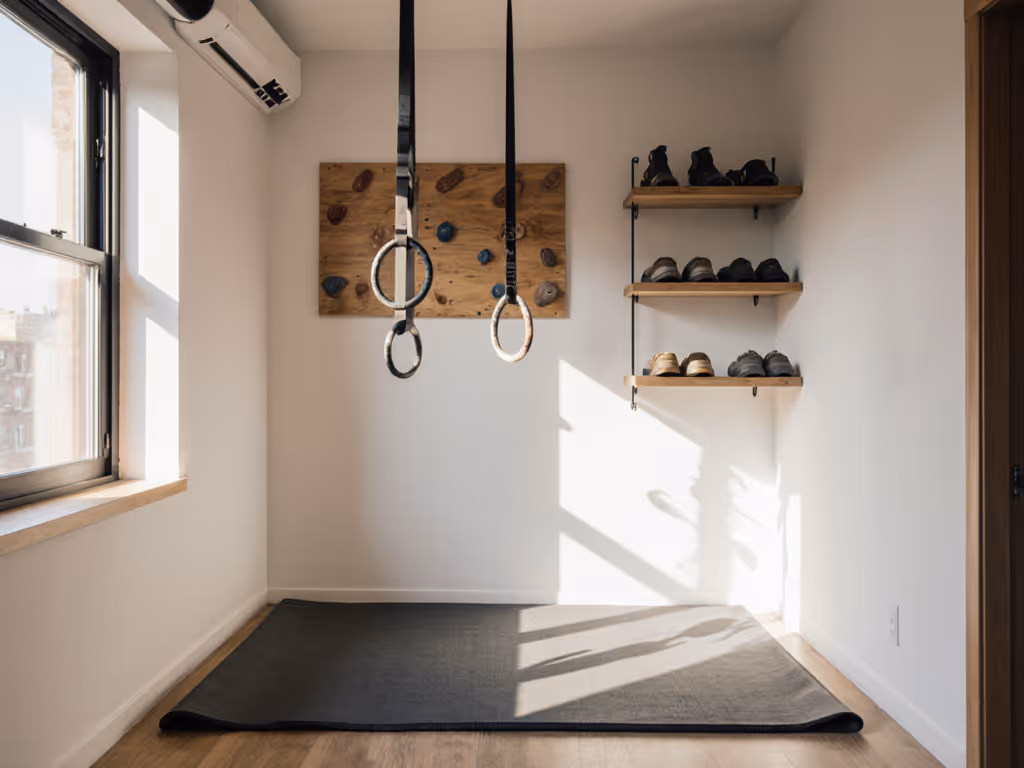
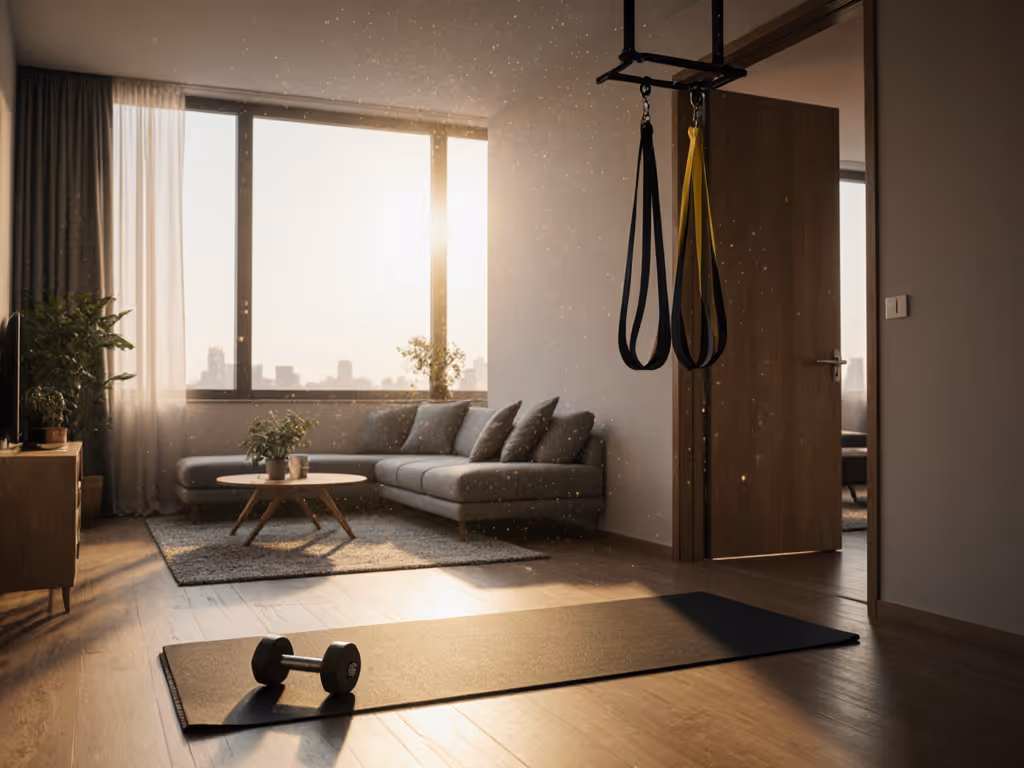
4.2 Rings or suspension trainer
Rings/TRX-style straps are excellent indoor climbing training gear for:
- Pull-ups, rows, and face pulls
- Core work (fallout planks, body saws)
- Shoulder prehab
Noise is extremely low (mostly fabric sliding and your breathing). They stash easily in a drawer or hook.
Compatibility notes:
- Need 210-240 cm (7-8 ft) ceiling height to use full range.
- Can clip to a pull-up bar, ceiling hooks, or exposed beam.
- Check working load ratings; look for far above your bodyweight.
4.3 Resistance bands
Resistance bands are quiet, cheap, and almost weightless to store. For climbers they're ideal for:
- Shoulder warm-ups and rehab
- Assisted pull-ups
- Light power endurance circuits (e.g., rows + presses between hangboard sets)
They can also double as low-impact conditioning when space or joints don't love impact.
4.4 Parallettes or low push-up bars
Parallettes are compact bars that sit on the floor and open up:
- Deep push-ups (increased range of motion)
- L-sit and tuck holds (massive core tension builders)
- Quiet handstand practice against a wall
Noise is almost zero, and they stack neatly against a wall or under a bed.
Total cost estimate for Now -> Next phase
- Portable hangboard: ~$30-$100
- Door bar: ~$40-$90
- Rings/TRX: ~$40-$120
- Bands and/or parallettes: ~$20-$80
You're in the $130-$390 range for a fully functional, quiet climbing micro-gym that fits in a closet when guests arrive. To keep this setup organized and fast to deploy, compare space-saving storage options.
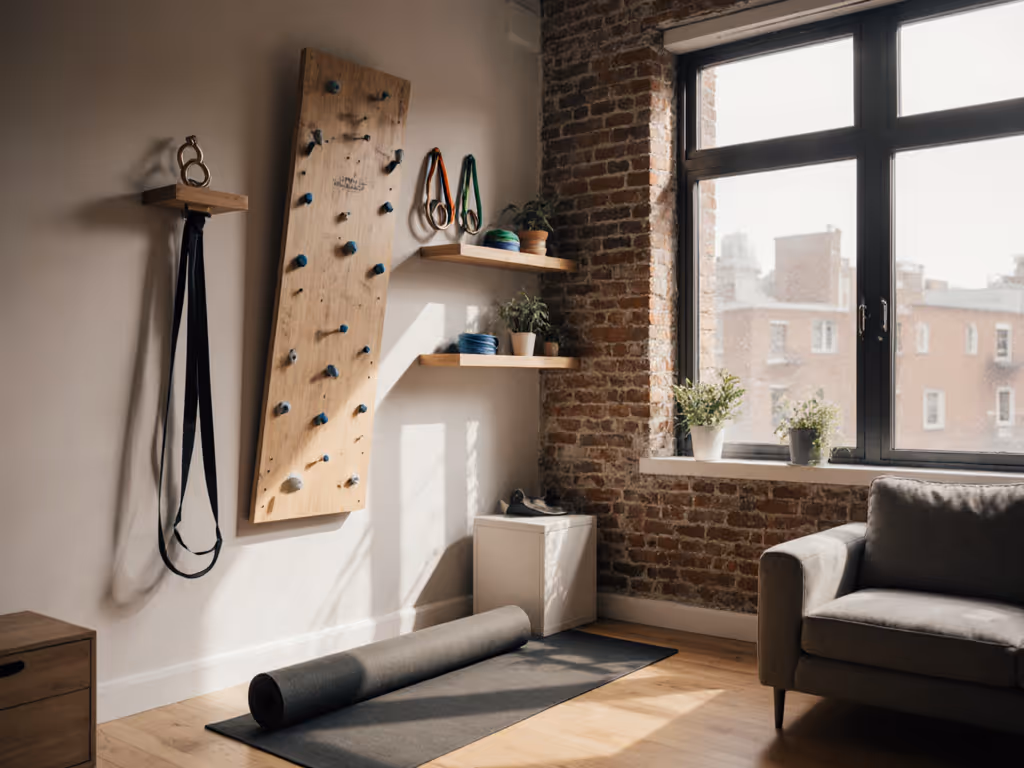
Step 5 - Plan (Don't Rush) a Home Climbing Wall Setup (Later Phase)
For many climbers, a home climbing wall setup is the dream. In noise-sensitive buildings, it's also the fastest way to blow up neighbor goodwill if you rush it.
5.1 Wall types and noise
Small, overhanging spray wall (e.g., 2-3 m wide)
- Noise sources: Foot impacts on footholds, body swings, occasional falls to pads.
- Mitigation:
- Thick foam pads over high-density rubber.
- No jumping or cutting feet aggressively.
- Limits on training hours.
System or tension-style board
- Adds structured holds and lighting but also more incentive to try dynamic moves, higher noise potential.
For upstairs apartments with neighbors directly below, a full wall is often not viable unless:
- The building is very solid (concrete floors), and
- You use highly controlled movement and generous padding.
Otherwise, you'll likely get 80+ dB spikes from landings - similar to dropping a moderate weight - transmitted through joists. To cut transmitted noise from foot landings, review our home gym flooring tests before you build.
5.2 Structural and landlord considerations
Before adding any frame-mounted wall:
- Confirm stud or masonry layout to distribute loads safely.
- Factor in pad thickness (10-30 cm / 4-12") when calculating headroom.
- Budget for fasteners and brackets rated for climbing loads.
- For rentals, consider free-standing or bolt-together frames that don't permanently attach to walls.
This is where many climbers realize that a robust hangboard + portable tools setup gives 80-90% of the performance benefits with a fraction of the cost, noise, and friction.
5.3 Space-reclaim strategies
If you do build even a small wall, protect room flow:
- Use the underside of overhangs for gear storage (slings, quickdraws, brushes).
- Keep pads sized so they can stand on edge in a closet.
- Reserve at least 90 cm (3 ft) of walking path across the room.
Think in terms of total cost of ownership: materials + pads + lost storage + time spent moving pads every time you need the room for guests.
Step 6 - Quiet Conditioning Options for Climbers (Later Phase)
Climbers don't need big, noisy cardio devices at home, but smart choices can improve recovery, weight management, and route endurance without destroying your noise budget.
6.1 Magnetic rower
- Noise: Often in the 55-60 dB range at moderate intensity (similar to conversation), according to typical user measurements.
- Pros: Full-body, seated, low-impact; folds upright in many models.
- Cons: 180-250 cm (6-8 ft) footprint when in use.
Rowers pair well with climbing as they train posterior chain endurance and light pulling volume without hammering fingers. If you're leaning this way, check our compact, quiet rower picks.
6.2 Magnetic spin bike
- Noise: Quieter than most treadmills; main sounds are drivetrain hum and your breathing.
- Pros: Small footprint, especially if you choose a non-fan, belt-drive model.
- Cons: Primarily lower body; less directly climbing-specific.
6.3 Walking treadmill (optional)
If you have strict quiet hours or a baby sleeping adjacent, even the quietest treadmills may be borderline. Cushioned, slat-belt models are usually quieter and less "slappy" than bare-bones units, but they still transmit some vibration.
If you choose one:
- Place it on high-density rubber + vibration pads.
- Keep speeds low and avoid running.
For many climbers in apartments, a magnetic rower or bike is the better noise-controlled choice.
Step 7 - Put It All Together: A Phased Roadmap
Here's how I'd stage a quiet, climbing-focused home gym for most renters and small-space owners.
Now (Month 0-2): Silent Climbing Essentials
Goals: Build finger strength and maintain pulling/core with nearly zero installation.
Shopping list:
- Portable hangboard (e.g., the masilas hardwood model above) for finger and pinch work.
- Non-screw doorway pull-up bar to hang the board and do pull-ups.
- Light resistance band set for warm-ups and prehab.
- Compact floor mat for comfort and a bit of vibration damping.
Budget: Roughly $100-$220.
Why this works:
- Almost no permanent footprint; everything hides in a closet.
- Noise is controlled, no dropping, no banging pins, no fan roar.
- Training effect focuses on the highest bang-for-buck qualities for climbers.
If you stop here, you already have a legitimate, quiet climbing training station.
Next (Month 3-9): Refine Strength and Body Tension
Goals: Increase exercise variety and stability while keeping clutter low.
Add-ons:
- Rings or suspension trainer clipped to your pull-up bar.
- Parallettes or sturdy push-up bars.
- Possibly upgrade to a stud-mounted bar if you're an owner or long-term renter.
Budget: Add $80-$250 depending on quality and installation.
Benefits:
- Rings allow rows, face pulls, and core work without new machines.
- Parallettes add quiet, high-tension core and shoulder strength.
- Everything still stores against a wall or in a closet, multi-use room friendly.
This is also the phase where some people move from a portable hangboard to a permanent one if their wall, landlord, and noise tests look good. Others stick with the portable board and upgrade only the mounting point.
Later (Month 9+): Evaluate Big Upgrades Carefully
Goals: Decide if a climbing wall or cardio machine is justified in your space.
Options:
- Small, overhanging wall with thick pads (owners, solid structures).
- Magnetic rower or bike for endurance.
Budget: Often $500-$2,000+ depending on wall size or cardio model.
Before spending here, ask:
- Have you used your current setup at least 2-3x/week for several months?
- Are noise complaints non-existent or fully addressed?
- Does the room still function well as a living/sleeping/working space?
If those answers aren't clear "yeses," hold off. It's better to keep a compact, well-used setup than to crowd the room with a wall or machine that becomes an expensive clothes rack.
Conclusion - Your Quiet Climbing Gym, On Your Terms
A genuinely effective, quiet indoor climbing setup doesn't start with plywood and a truckload of holds. It starts with:
- Honest constraints - walls, floors, neighbors, and time windows.
- Clear priorities - fingers, pulling, core, and only then conditioning.
- Phased gear - portable hangboard, pull-up solution, bands, then rings and parallettes, and only later big structures or cardio.
The Portable Hangboard for Rock Climbing Holds, Fingerboard Trainer for Hand Grip Strengthener, Pinch Block Grip, Home Gym Fitness Workout Equipment - Hard Wood fits neatly into that first phase: compact, quiet, and versatile enough to anchor a serious at-home finger strength program.
From there, your decisions should follow your actual usage and your space: small, reversible steps that preserve room flow and neighbor peace. I've been in the position of downsizing from bulky racks to compact, fold-away solutions; the setups that survived were always the ones that pulled double duty, stayed quiet, and didn't dominate the room.
Your next move:
- Sketch your room.
- Mark one wall and one overhead point you can realistically use.
- Write three columns: Now / Next / Later, and slot in only the gear that serves your real climbing sessions.
Keep that page next to your browser tab. Roadmap, then checkout. With that discipline, your home can stay calm and uncluttered while your climbing quietly gets stronger in the background.
Related Articles
Buying Guides by Audience & Goal
Tennis Performance Home Gym: 7 Quiet, Tested Equipment Picks
20th Apr•8 min read
Buying Guides by Audience & Goal
Best Quiet Yoga Gear for Small Spaces: Room-First Guide
7th Mar•12 min read

Buying Guides by Audience & Goal
Functional Home Gym for Runners: Injury Prevention Guide
23rd Feb•7 min read